Showing posts with label quilt as you go. Show all posts

Thursday, November 7, 2013

Herringbone Mason Jar Cozy {Tutorial}


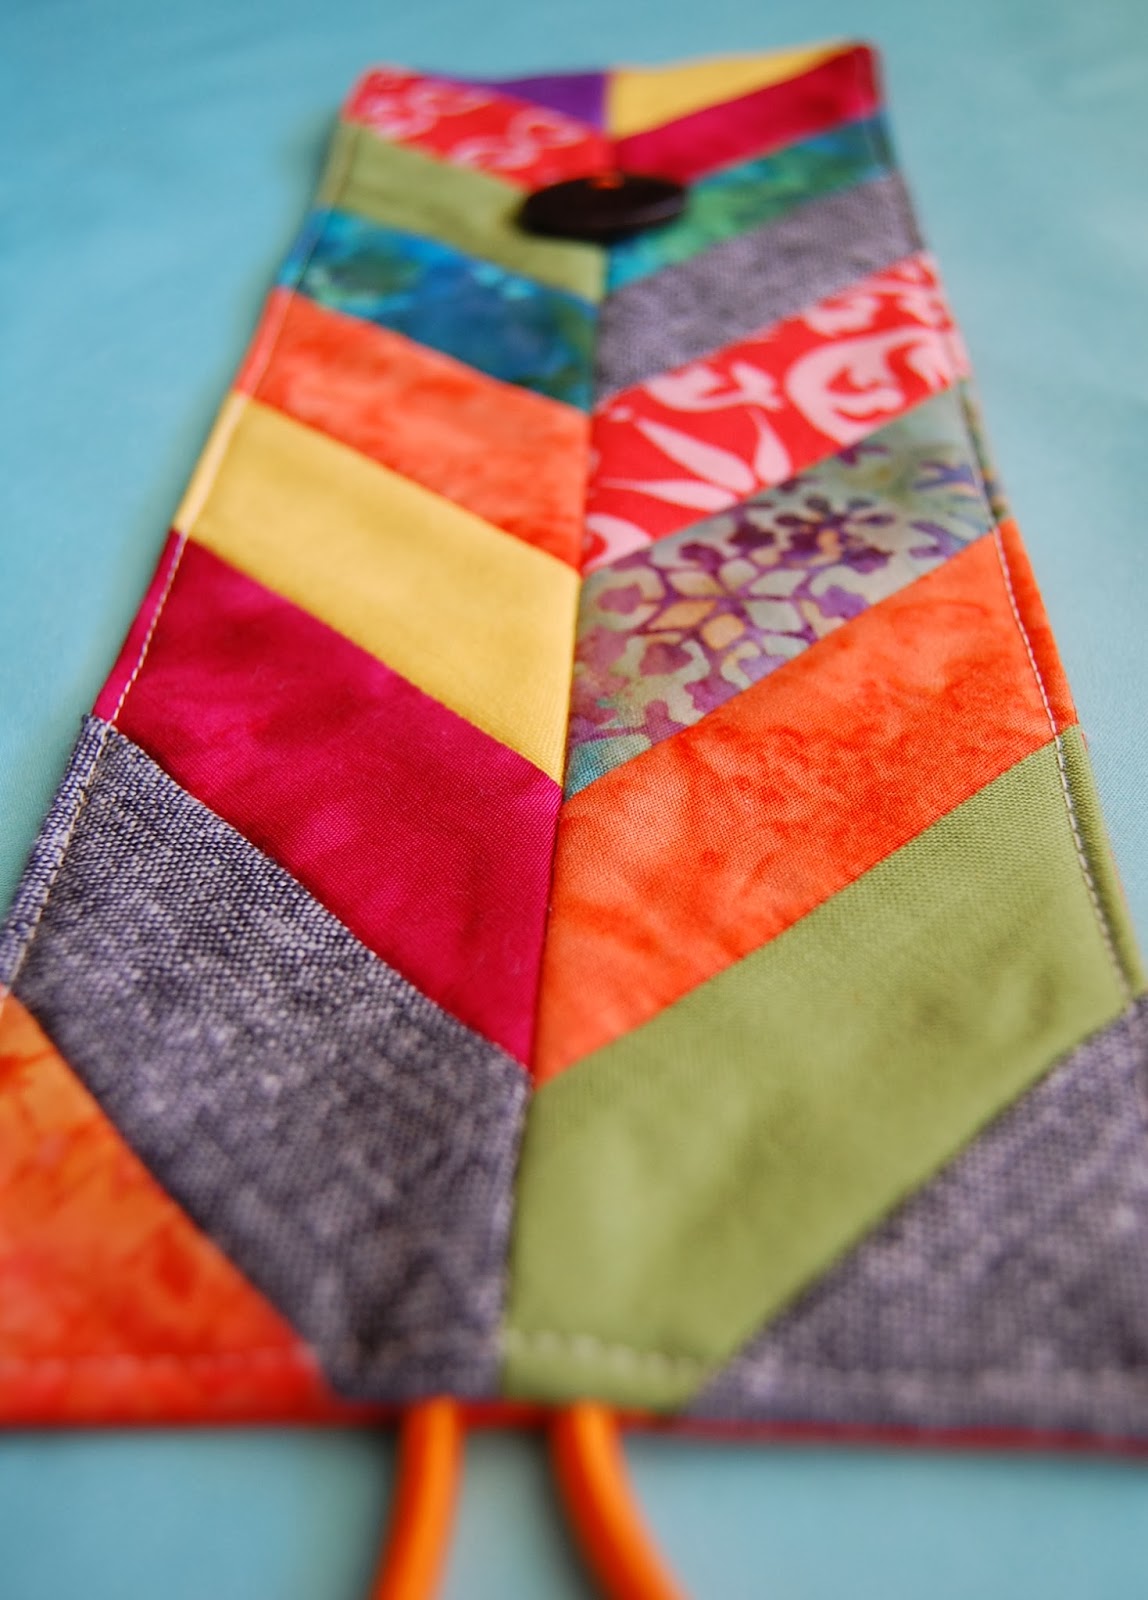
I am sorta done with chevron stripes, but I still LOVE herringbone!  I was involved in a fall gift exchange and wanted to send a gift that I loved, but that I also thought my friend would love.  Her favorite color is orange and she loves bright colors. 

I discovered Cuppow mason jar drinking lids a while ago and my whole family loves them.  And...they come in orange!  The lids can be used with hot or cold drinks.  And, either way, the mason jar needs a cozy to keep hand from getting too hot or too cold.

I looked around for a mason jar cozy that I liked and couldn't find one, so I decided to design my own.  I snapped a few photos so I could write this tutorial.

drawing the design


 Herringbone Mason Jar Cozy {Tutorial}

Supplies:

- 1 piece of cotton fabric 12" x 4" for the inside of the cozy

- 2 pieces of cotton batting 12" x 2.25"

- 20 scraps of fabric (will be cut to 1.5" by approximately 4.5")

- 1 hair elastic

- 1 button


Directions:

{Note:  You could easily make this without the herringbone design.  In that case, you would just cut two pieces of fabric and one piece of batting 12"x4" and then follow the directions for putting the cozy together.}

For making the herringbone top, I followed Maureen Cracknell's Herringbone Quilt Tutorial, adjusting the size.  (You will need to refer to her tutorial since I don't go into exact detail on how to sew herringbone strips to the batting.)

First, I cut my strips of cotton batting to 12" by 2.25":


(I currently don't have a rotary cutting board, so I've been using my Pampered Chef cutting board!  See, if you don't have the right tools, ruin use what you've got!)

Draw diagonal lines, 1 inch apart, onto each strip of batting:


Cut scraps of fabric into 1.5" x approximately 4.5" strips and lay them out in the order you want them:


Follow Maureen's directions for sewing the strips onto the batting in the herringbone pattern.


Turn each half over and trim down to 12" by 2.25":


 Sew the halves together at the center using a 1/4" seam and matching the herringbone seams:


Assemble the herringbone front, the fabric back and the hair elastic:

Place the herringbone front on your table, batting side down and herringbone design up.

Put the hair elastic on top of one of the the short edges of the herringbone panel at the center seam.


Lay the fabric back, right side down on top of the herringbone panel and hair elastic and pin together.  (In this photo, it looks like the right side of the orange fabric is up, but that's only because it is a solid kona fabric with no "right" and "wrong" side.)


Starting at the short end with the hair elastic, sew around all 4 edges of the layers, leaving a 3" opening on one of the long sides for turning.


Snip the corners and turn right side out.

Iron the cozy, turning in the raw edges of the opening you used for turning the cozy right side out.

Top stitch all around the cozy, sewing the opening closed as you go.


Wrap the cozy around your mason jar to determine where you want to place the button.

Using a disappearing ink fabric pen, mark where you will sew the button.


Sew button on with a needle and matching thread.

And....voila!  You've got yourself a herringbone mason jar cozy!


Let me know if anything is unclear or you have any questions!

Happy Sewing!
Melissa

Wednesday, October 10, 2012

The Scrappy Stash Quilt-Along: My Very First!

Ellison Lane Quilts

I am so excited to be participating in the Scrappy Stash QAL (quilt-along).  This will be the first time I've ever done a QAL and I think it will be a ton of fun.   There are five reasons I know I am going to love this QAL:

1.  It involves lots of color!
2.  It uses the improvisational log cabin block technique!
3.  QAYG, baby!  (quilt as you go)
4.  It's a contest with a deadline - and prizes!
5.  It uses up fabric scraps!

What's not to love about the Scrappy Stash Quilt-Along?

And look, I already have four blocks finished. 


Can you believe I did these four blocks several weeks ago before I even knew about the QAL?  

I'll take better pictures as I go.

It's not too late to join in.  The details are here on Elison Lane Quilts.

Hope you join in!


Friday, October 5, 2012

Kitchen Mat - Quilt As You Go


Ever since I started working on my bottled rainbows quilt, I have been a little obsessed.  

My obsession?  

Quilt as you go (QAYG)! 

Quilt as you go is a quilting technique where you quilt each square to the batting (and sometimes the backing) before piecing the blocks.    

If you have ever thrown a quilt across the room, cursed, stomped and possibly even cried, while trying to quilt a project all at once, you just might want to try QAYG.  
{Yes, I've actually done this.  Ask Doug.}

For a few weeks I've really wanted to try making a kitchen mat using the quilt as you go technique.  I wanted to practice attaching binding on a smaller, less important project before attaching the binding to my bottled rainbows quilt.  


I used a log cabin variation ( I didn't even know what that was two months ago) to make my mat.  

I chose four colors:  purple, orange, green and pink.  

After I added the middle pieces, I thought it would be nice to add a bit of neutral.  But, cream or light beige didn't seem like a good idea since the mat will be gracing my kitchen floor (and I'm VERY messy).  

I remembered a bunch of old denim jeans I'd been saving and decided to add denim!

I love the improvisational aspect of this project.  It is like coloring a picture - hmmm, what color do I want to use next?  I used no exact measurements, just decided what I wanted to do with each new piece of fabric added.  

I even purposely left the selvage on some of the pieces.  

I don't know why, but I love the little colored, numbered circles.


The following picture shows me about half way through the project.  The striped, beige background is actually an old quilt that I cut up and used as batting.  I sewed the new fabric directly onto the old quilt piece. 

I'm very excited about finding this use for my old quilts! 


 For the back of the mat I used one large piece of Jennifer Paganelli fabric.  


 Here is a picture of the finished mat hanging from a palo verde (or palo brea?) tree.  Don't the greens in the mat look great next to the gorgeous green branches?  The little monkey climbing in the tree is pretty cute, too.


 I learned a lot about the quilt as you go process on this little project and now I have a colorful (surprise, surprise) mat in my kitchen!  It may kill someone if I don't get some anti-slip material, but hey, it's cute! 


Today I will be stepping away from the sewing machine to actually engage with the humans in my life.

Hope you all have a great weekend!

And, oh, here is some oatmeal.  My secret to oatmeal my kids cheer for?  A splash of vanilla!


Thursday, September 13, 2012

What I'd Rather Be Working On...


Today I am working on a few doll orders that need to go out.  I'm also documenting my process so I can offer a My Gigi Doll Tutorial in my Etsy Shop.  I'm actually pretty excited about that.  


But....what I'd really rather be working on today is quilt squares!  I just learned a new quilt-as-you-go technique that I love.  I don't know exactly where I'm going with this, but I have in mind a rainbow colored quilt (surprise, surprise).    


I'm loving the white space...


What are you doing today?  Anything you'd rather be doing?  


Oh, and, here's a cat: